Bauble Bonanza
Greetings dear readers!
 Well, it was my last day of work today and I have 2 weeks off to revel in Christmas festivities, quite possibly involving mistletoe; definitely involving wine. Now, we all know that vintage is IN in a BIG way this Christmas, especially when it comes to baubles. When I did my annual jaunt around the Christmas markets, I was literally chiselling the vintage decor off me as I got back into my car. Not only am I in a position where I literally have nowhere left to hang baubles, but I had to sell my kidney on the black market to pay for my wares (a chap called Vlad took it; good price and they're short of good organs in Moldova). As I was lying on the operating table, having just come round from the harvesting and savouring the whiff of chloroform in the air, I was suddenly struck with an idea: why not make my own glass vintage baubles and save myself a body-part?! Why not indeed! And this, dear reader, is the subject of my blog today.
 5) Scoop up the blob of glass onto the end of the straw and blow, turning the straw continuously. DO NOT SUCK. Not even for fun. I can't emphasise this enough.
Following my foray into the blog-oh-sphere last month, I have found the end of Movember leaving me wanting. Not, as may be expected, in the facial hair department (I have kept my 'tash and am almost able to curl the ends of it), but in a lack of an outlet for my blogging pretensions. Following a soupçon of begging and emotional blackmail, Emily has kindly let me back onto the very hallowed ground of Berylune for therapeutic purposes. Do bear with me, I promise to be gentle.
So yeah.
 Well, it was my last day of work today and I have 2 weeks off to revel in Christmas festivities, quite possibly involving mistletoe; definitely involving wine. Now, we all know that vintage is IN in a BIG way this Christmas, especially when it comes to baubles. When I did my annual jaunt around the Christmas markets, I was literally chiselling the vintage decor off me as I got back into my car. Not only am I in a position where I literally have nowhere left to hang baubles, but I had to sell my kidney on the black market to pay for my wares (a chap called Vlad took it; good price and they're short of good organs in Moldova). As I was lying on the operating table, having just come round from the harvesting and savouring the whiff of chloroform in the air, I was suddenly struck with an idea: why not make my own glass vintage baubles and save myself a body-part?! Why not indeed! And this, dear reader, is the subject of my blog today.
In order to craft your own glass baubles, you will need:
- sand
- sodium carbonate
- calcium oxide
- iron oxide (if you want a greenish hue to your glass, which you will)
- an oven
- a metal straw thingy. About 2 metres long.
- a metal loop
- string
1) Preheat your oven to 1, 500 degrees Celsius (about 2,800 degrees Fahrenheit, in old money)
2) Select your sand carefully. I live near to the sea, but the stuff I got from the beach was full of bits of old wood, discarded disposable barbecues and other 'waste'. When I used this on my first run, not only was the glass of inferior quality, but I also got a nasty dose of cholera. I'd advise dressing up like a ninja and raid a kiddy sand-pit in the middle of the night. This has 2 benefits: the sand is of a much purer quality and you get to dress up like a ninja.
3) Mix your sand, sodium carbonate, calcium oxide and iron oxide together in a thick iron bowl and pop in your oven until it's melted.
4) Stir well.
 5) Scoop up the blob of glass onto the end of the straw and blow, turning the straw continuously. DO NOT SUCK. Not even for fun. I can't emphasise this enough.
6) Once you are happy with the size and shape of your bauble, let it cool slowly before removing it from the straw.
7) Fix your metal hoop to the top and tie with string. You can now attach your bauble to a tree or other Christmas hanging apparatus.
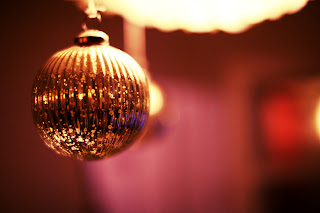
And there you have it, folks. It certainly took me a few goes, but you will see from the picture that I managed it in the end. I must confess that I did get a bit cocky and embossed some star shapes into the surface of the bauble while the glass was still soft.
If, unlike any true Christmas vintage aficionado, you haven't been trained in a Murano factory and don't feel up to trying this (and suffering the external and internal scar tissue that will live with you for the rest of your life), I can thoroughly recommend trying something simple like paper-chains or festive paper animals to start with, both available from the fine folk at Berylune. No one will think any less of you. Well, not much.
Keep it festive.